Monday, December 22, 2008

Decadent Lasagna Bolognese

Fig.1. This is my 2 nd favorite lasagna.


Are you fed up of people telling you that you’re out of time? Probably not, most of us are only too happy to subscribe to such sentiments, but to quote Public Enemy, “don’t believe the hype.” You have more time than you realize; in fact, we have nothing but time, it’s perpetual and constant: it keeps going even when you run out of it.
There is a point to all this and it has to do with a Loblaw’s commercial. In it, Galen Weston Jr. takes time to tell us that we don’t have time during the holidays to make lasagna, and, that it would be easier to simply buy his President’s Choice brand. Nonsense, aside from being much smaller than it appears to be on T.V., the colossal amounts of salt, sugar and unpronounceable additives and preservatives makes me weary of ingestion; it’s much healthier—and tastier—to simply make it your self.

Some believe the origins of lasagna can be traced back to the Greeks. In, The Oxford Companion to Food, Alan Davidson writes that lasagna’s “remote ancestor was the classical Greek laganon; this was a flat cake, not pasta as we know it now, but capable of developing in that direction.” Once the Romans got a hold of it they began to layer the thin sheets of flat breads and cakes with savory ingredients, such as chickpeas and leeks. The first evidence of what we know to be lasagna began to surface in the 13th century, when the medieval rolling pin and wheat dough first met. Rolling the dough flat was the first step in pasta making, and thus, the thin flat pasta sheets began to be used inventively. Once the tomato arrived in Italy in the early 16th century, it was only a matter of time before someone saw fit to combine them.

There are as many ways to make lasagna as there are Italians with opinions; however, there is one common ingredient all lasagnas must possess: wholesome, proper ingredients. Making it in two stages makes it more manageable. I like to make the sauce first, let it sit a day or two in the fridge (which as you know will result in a better tasting sauce) and assemble the lasagna on another day. Lasagna freezes beautifully for up to a month, all you have to do before your guests arrive is turn on the oven. Making lasagna with your kids is also great as you can reward them with all of the pasta pieces that don’t make the puzzle. Serve with a simple green salad.

Lasagna Bolognese
This recipe makes a 9”x15” lasagna and serves 8 to 10 hungry people.


Fig.2. Let the lasagna rest for 10 minutes before cutting into it.
Ingredients:

-3 slices of bacon, finely sliced
-3 tbsp olive oil
-2 tbsp butter
-2 cloves garlic, chopped
-1 large onion, finely diced
-2 tbsp grated carrot
-2 tbsp celery leaves, finely chopped
-1 lbs ground lean beef
-1/2 lbs ground pork
-1/2 lbs Italian Genoa salami, cut into small 1 cm squares
-1/4 tsp allspice
-2 tbsp parsley
-28 oz canned plum tomato, crushed (1 large can)
-2 6 oz cans tomato paste (2 small cans)
-1/2 cup water
-salt and pepper
-400g ricotta
-1 egg
-1/2 cup grated parmigiano reggiano
- ¼ tsp pepper
-app. 500 g mozzarella, grated
-18 sheets of pasta. (My mother-in-law likes to use catelli lasagna noodles, but feel free to use any you like.)

Directions:

Cook bacon over medium heat until done, 7 to 8 minutes. Add oil, butter, garlic, onion, carrot and celery and continue cooking over medium heat for 5 minutes. Add ground beef and pork, salami, allspice and parsley and cook until meat is cooked through, about 10 minutes. Add canned crushed plum tomatoes, tomato paste, water, salt and pepper (to taste), stir well and simmer gently, uncovered for 45 minutes until thickened. (The sauce can be made a day or two before.)
In a separate bowl combine ricotta, the egg, parmiggiano reggianno and pepper. Mix well.
Cook pasta according to package instructions and lay cooked noodles out on an old tablecloth to dry making sure pasta doesn’t overlap in order to prevent sticking.
You’re ready to begin the assembly.
Preheat the oven at 375 degrees Fahrenheit. Coat the baking dish with a non-stick spray. Start with the sauce, then a layer of pasta, and then apply some sauce, cheese mixture and a sprinkling of grated mozzarella. Repeat the pasta, meat sauce, cheese and mozzarella layers until the pasta is all used up. Finish the lasagna with the remaining sauce and a generous amount of grated mozzarella. Cover the lasagna with a piece of aluminum foil sprayed with a non-stick spray and bake for 45 minutes or until hot in the center. Let lasagna rest for 10 minutes at room temperature before serving.

Sunday, November 30, 2008

Christmas Biscotti

Fig.1. Christmas biscotti with pistachio and dries cranberry.

I wrote this recipe for the November/Christmas issue of More of our Canada Magazine. It's a basic biscotti recipe but the addition of ground almonds gives them a nuttier taste as well as a better texture.
Space in the magazine is somewhat limited so here are some additional pictures for those of you who have sent me questions regarding shape and size. And for those who like their biscotti soft all I can say is cook them for a shorter period of time, or eat a piece of cake! Biscotti should be hard, it's up to the coffee to soften them up.

Ingredients
-3 eggs
-3/4 cup granulated sugar
-1/2 cup butter, melted and cooled
-3 tsp vanilla extract
-2 ½ cups all-purpose flour
-1/2 cup ground almonds
-3 tsp baking powder
-1/2 tsp salt
-zest of 2 limes
-1 cup dried cranberries
-1 cup shelled pistachios

Fig.2. The correct size, 3" wide by 12" long. Don't forget to round out the edges.

Directions
-In a large bowl or mixer, beat eggs; gradually beat in sugar, butter and vanilla.
-In a separate bowl, mix flour, ground almonds, baking powder, salt and lime zest.
-Add the flour mixture to the egg mixture and combine to form soft, sticky dough.
-Fold in the cranberries and pistachios and turn dough onto a lightly floured surface.
-With floured hands form into a ball.
-Divide dough in half and shape into logs 3 inches wide by 12 inches long with rounded edges.(see fig.2.)
-Place logs on large greased baking sheet at least 4 inches apart.
-Bake in a 350F preheated oven for 20 minutes or until slightly firm.
-Remove from the oven and let cool for 10 minutes.
-On a cutting board, cut the biscotti on a diagonal into ¾ inch slices using a very sharp knife.
-Place biscotti upright on baking sheet and continue baking for 20 to 25 minutes at 300F.
These biscotti will keep in an airtight container for up to a week. They can also be frozen for several months.

Tuesday, November 25, 2008

Flank for Frank

-----------------------------------------------------------------------

Fig.1. Flank steak with mushrooms and baby arugula

  • Last year my friend Frank and his brothers bought a cow from a farmer in the Eastern Townships. It was a five hundred pound, 18 month old grain fed calf that was never given any hormones or antibiotics. The beast cost $2.00 a pound bringing the total to a cool one thousand dollars. The animal went into a butcher shop on all 4’s and came out in about 400 pieces, all vacuum packed. Last week Frank called me wanting to know what to do with one of these vacuum packed pieces of meat.
    Flank steak, or bavette as it’s known in French, is a wonderful piece of beef with real taste, unlike the favourite but flavourless filet mignon which everyone seems to like because of its “melt in your mouth quality”. But I say, if you want it to melt in your mouth eat chocolate; meat needs to be masticated, savagely chewed and ripped off the bone with the fierceness of a hungry lion.
    So if you’ve never had flank before give it a try before putting your barbecue away for the winter.

    Grilled Flank Steak
    Because of its shape—thick in the middle and thin on the sides—flank steak cannot be evenly cooked, but this play on texture is part of its appeal. The flavour is also very unique as it has a slight kidney taste to it. The key to a proper flank steak is a suitable, tasty outer crust and a red center.

    Ingredients:
  • Flank steak
  • Olive oil
  • Montreal steak spice
  • Directions:

    Turn your grill on high, meanwhile score the steak in a criss-cross fashion—without going too deep, about ¼”deep—and rub some olive oil and Montreal steak spice on both sides. (It’s important to bring your steaks to room temperature, take them out of the fridge and season them 1 ½ hours before cooking.)
    Grill the steaks to your desired doneness, (as long as it’s not well done). Let the steak rest on a plate with some foil over it for about 10 minutes. Serve with a green salad.
    If your grill is locked up for the winter, use a pan. Cast iron works well, but if you don’t have one a regular non-stick skillet will do.

    If you serve the salad over the steak, omit or go very lightly with the vinegar.

Tuesday, October 28, 2008

Relish

-----------------------------------------------------------------------


This is for all of you who have a garden in the backyard; don’t let those green tomatoes go to waste, it’s time to preserve. Nothing warms the heart more than a well stocked cold room—food security for those barren cold winter days.
Relish need not simply be resigned to hamburgers. Serve as an antipasto, as a bruschetta, with grilled fish or steak, or over pork chops; the possibilities are endless.
I’ve made relish with carrots, corn, fennel, zucchini, celery and most types of peppers. If you don’t have a garden, go to a farmer’s market and pick up some vegetables. There are still some great deals to be had and it’s a great time to haggle with the farmers.

Green Tomato Relish

Ingredients

  • 8 to 10 small green tomatoes, sliced
  • 2 small red peppers, diced
  • 2 small onions, sliced
  • 3/4 cup sugar
  • 1 cup vinegar
  • 1/2 cup water

Directions

While stirring, bring the water, sugar and vinegar to a boil. Once the sugar dissolves, add all of the vegetables and bring to a boil once again. Boil for 2 to 3 minutes and shut off the heat. Meanwhile, sterilize your mason jars and lids in boiling water, and, while still hot, ladle the still hot relish into the jars. Seal the jars --making sure not to over-tighten--and cover with a kitchen towel overnight, the vacuum seal will occur as long as the relish and jars are very hot.

This recipe can be done to your liking. If you want it sweeter, add more sugar or less vinegar. If you don't like it sweet omit the sugar all together as we do with some of our preserved vegetables in Italy. Taste the liquid before adding the vegetables. And if you have more vegetables than called for in this recipe, make sure the liquid just covers the vegetables. Also, if you have any fresh herbs in your garden don't let them freeze to death, add them to your relish; tarragon and sage add a wonderful taste to all chutneys and relishes.

Thursday, October 2, 2008

Nothing Like a Quebec Pepper

-----------------------------------------------------


Fig.1. Traditional Calabrese peppers, both mild and spicy, are hung out in the sun to dry. They are best when still chewy. They are eaten raw or fried.


Caught a virus last week and the doctor’s orders were to put my feet up for a few days. It seemed like the perfect opportunity to watch The Sopranos again from the very beginning. After getting through the first season I couldn’t help but notice the frequent food references in every episode, and if there’s one food that’s mentioned more than any other, it’s peppers. Tony and his crew eat them raw, fried and pickled, and mostly in sandwiches. Among the more frequently mentioned panini are: peppers and eggs, vinegar peppers with capicollo, and of course, the classic peppers and sausage. As far back as I can remember, sausage and pepper sandwiches were a staple, the peppers were either roasted or fried.
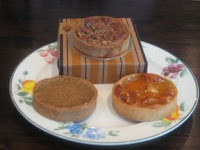
Fig.2. A fun American Italian cookbook with recipes such as baked ziti, Sunday "gravy" (tomato sauce) and of course, peppers and eggs sandwiches

Roasting peppers is an annual tradition in most Italian households. The peppers are roasted on a barbeque until the skin chars, after which they are peeled, stored in freezer bags and frozen. Roasted peppers will easily keep in the freezer for up to a year.
Frying peppers simply requires a pan, some olive oil, and of course, fresh peppers; and they don’t get any fresher than what’s available right now. I’m not going to lie to you, frying peppers is nasty business. As soon as the pepper makes contact with the hot oil the sound and splatter will bring any seasoned cook to attention.


Fig.3. Fried peppers. Hungarian, Jingle bells and bell peppers.


The splatter of oil droplets leaping out of a hot pan is a phenomenon every Italian is familiar with: it’s known as “schizza”, which loosely translates to splatter or spray. As kids, we were always warned about the dreaded schizza upon entering the kitchen. Many good eats produced the hand scorching droplets: bacon and eggs, eggplants and pizze fritte (fried dough made with raisons, anchovies, or salted cod around the holidays) are but three dangerously delectable delicacies produced in a hot fry pan; my Mother shielded us from this assault by placing a paper napkin over a three hundred degree pan of hot oil.
If third degree burns on your hands aren’t your thing, might I suggest simply freezing the peppers? If peppers are frozen while still fresh they will retain their taste and texture for months. Just slice them into strips and store in a freezer bag removing as much air as possible. The next time you roast a chicken or rabbit just add the frozen peppers and some potatoes along with it.
Buy and preserve your peppers now; they taste and look great, they’re inexpensive and best of all, they don’t need to travel all the way from the Netherlands. Most of the peppers found in supermarkets during the off season are indeed Dutch; help reduce the carbon footprint, buy enough Quebec peppers to keep you going until harvest 2009.

Saturday, September 13, 2008

Hungry For Tomatoes

You’ve got to love this time of year. My last visit to the market brought me to tears and it’s all because of the visuals. Those plentiful bushels of tomatoes, peppers and eggplants make me want to swim in them—with my swimming trunks' on of course.
The earth has offered up her bounty; it’s time to taste the food the way it was meant to be tasted. I found these small, Jingle Bell peppers over at Birri Brothers in the Jean-Talon Market that would satisfy any sweet tooth. And the tomatoes, what can I say about my beloved red fruit that hasn’t already been said before except to say this year’s tomato crop isn’t really up to par. The weather this summer has produced tomatoes with blandness in flavour and graininess in texture. Even the tomatoes from my own garden have let me down; most of them bearing little black spots indicative of too much rain.
This doesn’t mean we should give up on tomatoes this year; I do very much like the local hothouse cherry tomatoes. The controlled environments in some of the greenhouses produce wonderful tasting tomatoes. Some of these tomatoes are available by the bushel and are worth preserving as tomato sauce.
Another fantastic tomato revelation made at the Jean Talon Market came in the form of heirloom tomatoes. I found these rare tomatoes at Le Potager Mont-Rouge. Heirlooms are grown with flavour in mind and not for appearance. I implore all of you to try these tomatoes; the taste and flavour are a revelation.


Fig.1. Heirloom tomatoes. From the top: Red Pepper, Green Zebra, Yellow Brandywine, orange pineapple.


Preserved Tomatoes


Fig.2. These beautiful preserved tomatoes make a wonderful addition to any cantina.

The following recipe is for diced plum tomatoes, but you can preserve any variety of tomato you wish, as long as it’s fresh, ripe, and local.

-Sterilize your Mason jars and lids (I put them in the dishwasher). Once completely dry, place 3 or 4 basil leaves at the bottom of each jar.
-Remove stems and wash tomatoes.
-Make an incision in the shape of an X on top of the tomatoes with a sharp knife.
-Immerse the tomatoes in a large pot of boiling water for about 2 minutes. (The time can vary depending on the ripeness of the tomato. After a minute test one of the tomatoes, if the skin comes off easily, it’s done.)
-With a colander, scoop out the tomatoes and drop them in a bucket of cold water. This temperature shocking helps separate the tomato’s skin from the pulp.
-Peel the tomatoes discarding the skins. Over a wide canning funnel inserted into a jar, cut the tomatoes in pieces and drop them in the jar until full.
-I like to top each jar with some pureed tomatoes to ensure that no air pockets remain in the jar. Simply puree some of the peeled tomatoes in a blender and then add the tomato puree to each jar. Tap the jar gently on your work surface to release any trapped bubbles.
-When the jar is full, seal with the lids making sure not to over tighten.
-Once the tomatoes are all jarred, seal in a water bath and let them cool gently overnight.

I also started preserving tomatoes with the skins on. Tomato skins contain lycopene, a powerful, proven antioxidant. Follow the same procedure omitting the removal of the skins. If you don’t like seeing curled up tomato skins in your sauce, just puree the sauce in a blender before cooking it. The pureed seeds and skin add a different dimension to the finished sauce.


Tomato facts.

-Tomatoes are a good source of vitamin C, beta carotene, folate, and potassium.
-The skin of the tomato contains lycopene- a powerful antioxidant.
-A medium tomato contains only 26 calories.
-Unlike picked tomatoes, vine-tomatoes continue to ripen naturally

Friday, September 5, 2008

Little Blue Candy

Fig. 1. Spread the blueberries out on a cookie sheet, use a piece of brown paper to help prevent sticking.

It’s come to my attention that some readers feel my articles are too long; well I’m listening, so in keeping with the diminutive let’s talk about blueberries.
The plump blueberries, which are found in and around Montreal, are cultivated. The small, sweet berries, which hail from Lac St-Jean and Abitibi, grow wild, and, in my opinion, taste better.

Blueberries freeze very well (just look at the wide variety of Europe’s Best berries in supermarket freezers.) Spread the blueberries on a cookie sheet lined with brown paper and place in the freezer. Store in ziplock bags removing as much air as you can.
Although there are countless ways to use blueberries, what I propose is that you try them “au naturel”. The small wild blues are like candy. (I know the article is a bit late for blueberries but you can still find some at the Jean Talon Market.) And they’re excellent frozen; just add them to your cereal, yogurt or ice cream.
But for those of you who love the recipes, here’s my favourite blueberry pancake recipe from Canadian Living magazine.


Fig. 2. These flapjacks are thick and fluffy.

Flip-Over Blueberry Pancakes

Makes 14 pancakes

Ingredients

-1 ½ cups all-purpose flour
-1 tbsp granulated sugar
-1 tbsp baking powder
-1/2 tsp salt
-1 ½ cups milk
-1 egg
-1 cup frozen blueberries
-1/4 cup vegetable oil

Directions

-In large bowl, whisk together flour, sugar, baking powder and salt. In separate bowl, beat together milk, egg and 3 tbsp of the oil. Pour over dry ingredients and mix just until combined. Once the batter comes together, fold in the frozen blueberries.
-Lightly brush non-stick pan with some of the remaining oil; heat over medium heat. Using ¼ cup per pancake, pour in batter. Cook until bottom is golden and bubbles break on top, 1 ½ to 2 ½ minutes. Turn and cook until bottom is golden.

Saturday, August 16, 2008

Little Italy Needs to Start Thinking Big


Fig.1 Italian flag throwers


Our three levels of government, as well as the Congres National des Italo-Canadiens, have graced us with yet another Semaine Italienne de Montreal; this, the 15th edition, was once again held in Little Italy. And while I greatly commend all of the organizers for supporting and promoting Italian culture within all of the Montreal communities, I do take issue with the way in which the event was organized, or lack thereof, by the merchants of St-Laurent Boulevard in Little Italy, who failed once again to demonstrate any zeal, dedication and passion evident in other Italian festivals in cities such as Boston and New York. What will it take for the St-Laurent Street Association to organize themselves in such a way as to provide the public with as much diversity as possible?

For example, where's all the street food? Most of the restaurants have placed patio tables well into the street in the hopes that the passer-by's will sit and be served, but missing are the smells and visuals associated with food prepared and served right before your eyes. Now I'm well aware of the fact that the restaurant owners on St-Laurent do not want street food sold for fear that it would take away from the sit down crowd, but I for one don't believe that some freshly sliced prociutto or fresh olives served in a paper cone will stop people from having supper.


Street food is older than Rome itself and is as much a part of Italy as the leaning tower. The taste of simple, pure street food works on so many levels; from the aroma of the food to the visual pleasure derived from food prepared just for you as everyone looks on--and by the adventure which ensues when you walk with your food; sightseeing is so much more appealing when you have a sausage panini in your mouth.

The merchants of St. Laurent--as well as all of the Montreal Italians living in and around the city-- need to find that Italian pride which comes out every four years for the World Cup. Every restaurant on St-Laurent Boulevard, from St-Zotique to Jean-Talon, should setup on the street and serve something different from the restaurant next to them to ensure proper variety and representation of the Country they are there to honour. And when I say all, I mean all of the restaurants and pastry shops should be opened and displaying--no exceptions. While I saw sausage paninis already prepared and sitting in an aluminum tin for sale (don't they know how many more people they'd attract if they grilled that sausage on the spot, the smell of freshly sauteed onions and peppers that would accompany the sausage is enough to drive a person crazy.) And what about the paninis with cold cuts sitting behind a display case? The mortadella had already begun to change colors and the lettuce had wilted. Don't they know that by slicing the cured meats in front of the costumer-like they do in Italy- it not only provides the much needed show the hungry buyer needs but also makes the sandwich taste so much better. Sadly missing from the event was Italy's favorite food; none of the restaurants had a pasta stand on the sidewalk.

The restaurant owners will tell you that if the pedestrians eat too much while strolling up and down the street, they won't have a sit down meal in their establishments. Yes, this will happen, some people will consume too many street eats, but, what I believe will also happen by having more street food, (as well as more activities for the kids) is a surge in attendance. It might not happen the first year but as people catch on it would become an event not to be missed, such as the Feast of Saint Anthony's in Boston's North End.


Fig. 2 Porchetta at San Lorenzo


Now that I've got all of that out of my system, let's talk about the good and fun aspects of the Semaine Italienne de Montreal. Many of the restaurants did a great job creating that terrase feel by placing tables well out into the street. I also saw a beautiful whole porchetta being spit-roasted over some hot coals out on the sidewalk at the new swank San Lorenzo eatery. My wife liked the shoes on display outside the Rubino store and my son liked all of the soccer apparel on sale outside Evangilista Sport, and I quite enjoyed seeing all of the scooters and Fiat 500's, as well as the small kiosk by the Opera de Montreal, some of the costumes used by the opera company were on display.


Fig.3 Pizza Margerita from Pomodoro


As for supper, some friends had recommended I try the pizza at Pomodoro. My quest for great pizza has brought me to Napoli, Rome, New York and Boston. Montreal had always left me a bit disappointed in the pizza department. The pizza at Pomodoro, however, did not disappoint. It was a beautifully cooked thin crust pizza which wasn't overloaded with toppings allowing you to taste everything on the pie equally. The crust was well stretched and cooked until the outer part developed that signature blackened texture, which I believe adds more flavour to the pizza. The only change I would make is to the mozzarella, which on my all dressed, was slightly rubbery. A "fior di latte" fresh mozzarella would have, in my opinion, improved it. The pizza with porcini mushrooms was a definite winner. The taste of the wild fungi worked well with the firm but supple crust and hand squeezed whole plum tomatoes. The crunchy fried calamari were also very good.


Fig.4 All dressed pizza


After a great meal we finished the night off as they do in Rome; by taking a "passeggio" while eating a gelato. Looking at all of the people, I couldn't help but once again wonder what this "festa" could become if all Italians cared a bit more.


Pomodoro. 6834 St-Laurent Boulevard

514 667-3867 http://www.ristorantepomodoro.com/

Wednesday, August 13, 2008

Italian Corn


Fig. 1 Despite the bad weather, Mario's new cookbook inspires the grill hound to get out there and try new things.


My wife is convinced that Italians have a way of making everything their own. She contends that it isn’t enough for our egos to bask in the fact that it took an Italian to figure out that the earth revolves around the sun, or that an Italian discovered the New World; or that we produce some of the best cars and clothing this world has ever seen. (I could go on and on, but I digress.) However, upon looking through my new Mario Batali cookbook, Mario Batali: Italian Grill, I’m starting to realize that maybe my wife has a point.
This very functional cookbook is typical no-nonsense Mario; full of great grilling advice and saturated with wonderful ingredients. But what got me to thinking about whether Italians have an issue with self-importance occurred when I came across Mario’s grilled corn on the cob recipe.


Fig. 2 One big heap o' corn in St. Philippe, just outside of Lachute. A beautiful part of driving through the small, scenic roads of Quebec during the summer is the abundance of local farmers selling their fruits and vegetables. Not to mention all of the hot dog and fry joints.

Quebecois love corn on the cob; even I don’t like to mess with a good thing. Boiled or grilled, slathered in rich butter and doused in salt; perfect! But Mario--a cook who advocates the simplicity of fresh ingredients-- theorises here that if you slather anything in parmigiano-reggiano cheese it will taste better. Normally I would be inclined to agree with Mario, but the local corn, like those I picked up just outside of Lachute from a corn farm, are perfect. Plump and very sweet as a result of all the rain we’ve been seeing.
That being said, far be it from me not to try anything once, or to doubt one of the greatest Italian inspired cooks of all time.
Here’s Mario’s corn recipe as seen in Mario Batali: Italian Grill.

Fig. 3 Grilled corn on the cob Mario's way.

Corn, as Italians would eat it.
Makes 6 ears.

Ingredients
6 ears corn, shucked
¼ cup extra-virgin olive oil
3 tablespoons balsamic vinegar
1 to 1 ½ cups freshly grated parmigiano-reggiano
About 2 tablespoons chopped fresh mint
Hot red pepper flakes

Directions
Preheat a gas grill or prepare a fire in a charcoal grill

Place the corn on the hottest part of the grill and cook for 3 minutes, or until grill marks appear on the first side. Roll each ear over a quarter turn and cook for 2 to 3 minutes, then repeat two more times.

Meanwhile, mix the oil and the vinegar on a large flat plate. Spread the parmigiano on another flat plate.

When the corn is cooked, roll each ear in the olive oil and vinegar mixture, shake off the extra liquid, and dredge in the parmigiano to coat lightly. Place on a platter, sprinkle with the mint and pepper flakes, and serve immediately.

My wife and I both agreed that while Mario’s version has its merits, the cheese and vinegar take away from the sweetness of the corn. I also find that the use of red pepper flakes in their whole form are useless because they don’t adhere properly to the corn. For a proper spicy flavour, use ground chili peppers, or, do what they do in Mexico and sprinkle the corn with cayenne pepper.

Fig. 4 If you're going to eat corn do it right. Forget spreading the butter with a knife, it doesn't work; the butter always melts off the corn. Instead, unwrap a fresh pound of butter and roll the hot corn on the block. Don't forget the salt.


Thursday, July 31, 2008

Vile Weed


There’s something bittersweet about discovering something new. Bitter because just as I thought my knowledge of Italian ingredients had reached a certain level, I discover something I didn’t even know existed; and sweet because just as I thought my knowledge of Italian ingredients had reached a certain level, I discover something I didn’t even know existed.
Indeed, this was the conundrum realized upon me with a visit to the revered Birri Bros. kiosk at the Jean Talon Market last weekend.
Gazing at all of the vibrant leafy greens, I noticed something that looked like a cross between rapini and cavolo nero.
Spigarello—or spigariello as it’s known in Italy—is a relatively unknown leafy green grown by some local farmers such as the Birri family. Some cultivators consider it to be akin to wild broccoli.
I was told to treat spigarello much the same way I would rapini. Not being a fan of rapini this wasn’t a great incentive to take it home, but I was assured the taste of spigarello was quite different. Well, it wasn’t. It’s just as bitter and the stems are quite fibrous; wonderfully suited to clean out your colon.
If you enjoy bitter, leafy greens you’ll enjoy spigarello. Give me some chicory or Swiss chard any day.

Sautéed Spigarello

Ingredients

1 bunch of spigarello
4 large cloves of garlic
¼ cup of extra virgin olive oil (use the good stuff here)
Kosher salt or fleur de sel
Red pepper flakes
Juice from ¼ lemon (optional)

Directions

-Wash the spigarello thoroughly in cold water. Cut off the stems and discard. Bring a large pot of salted water to a boil and add the spigarello. Blanch the greens for 3 minutes; if you want them to keep their bright, green color, drop them in ice water, or, if you don’t care what shade of green they are, just drain them in a colander.
-Heat the olive oil in a large pan over medium low heat. Add the whole cloves of garlic to the oil and let them brown slowly. You want to flavour the oil here and not cook the garlic too fast. Once the garlic cloves are golden brown, remove them with a slotted spoon and reserve for later.
-Turn your heat up to medium and add the spigarello, season with the salt and red pepper flakes and sauté for about 5 minutes.
-Turn off the heat, add the reserved garlic, lemon juice and toss it all together. Serve with a light drizzle of extra virgin olive oil and some more salt if needed.


Note: You can use this recipe for any leafy green. You can also incorporate the greens with pasta. I find that if you add enough bacon, sausage, and parmigiano cheese to the pasta, the greens are actually not bad.

Saturday, July 12, 2008

So Many Berries so Little Time


Fig. 1. One full crate, twelve heaping pints


Local Quebec strawberries are, at this moment, perfect. One of my favourite farmer’s markets had the ruby red, sweet berries on special this week--$12.00 a crate compared to $20.00 (a crate contains 12 pints). Seemed like the perfect excuse to make jam.
Now I know most of you are probably thinking—jam, who has time for that—but before you google something else, let me suggest a different type of jam.


Many cookbooks, from America’s Test Kitchen to Canadian Living, have recipes for fast strawberry jam; all are very similar in ingredients and execution, but, I’ve found one in particular which I like above all others--it comes from Jamie Oliver’s, Jamie at Home. This is a great book for fruit and vegetable lovers, as well as for the avid gardener. It’s filled with beautiful pictures and great advice on how to properly grow a wide variety of fruits and vegetables. Oliver inspires and rightfully preaches the benefits and need for proper, honest and real food.
Just to prove that making a quick jam doesn’t entail standing next to a stove all day, I’ve kept a timeline. I also use a large non-stick pan so I don’t have to worry about constant stirring and fruit sticking to the bottom of the pot.


Fig. 2. I could have stared at this bowl all day.


-10:30. After my son’s soccer practice, he and I sat outside in the warm morning sun and cut the stems off ten pints of strawberries. We ate one pint while we worked and kept one for a planned dessert. By the way, getting your kids to help out with kitchen duties is an excellent way to introduce them to proper food. Even if they sometimes don’t want to participate, I strongly advise that you occasionally make them help you. The strawberry moment I had with my son was time that would have found him otherwise sitting in front of the television watching Storm Hawks.
-11:10. Sprinkled the strawberries with sugar and smushed them with my hands. (Yes I washed them well.)
-11:15. Dumped the strawberries in a pan and turned on the heat.
-11:17. I began to mow the front lawn.
-11:26. Checked on the jam, it was just starting to bubble, gave it a stir.
-11:28. I proceeded to mow the back lawn.
-11:38. Gave the jam a stir and skimmed some of the foam off the top.
-11:40. Sat down and read the Montreal Gazette. Stirred and skimed the jam every 5 to 10 minutes.
-12:20. Removed the jam from the heat.
I like to put the jam in 500ml mason jars. It’s important to understand that since the jars are not sealed they will not keep indefinitely; they will keep up to four weeks in the fridge and up to a year in the freezer. If you want to seal the jars they must be placed in a water bath.
The recipe below is adapted from Jamie Oliver’s, Jamie at Home. Because the strawberries are so sweet, I’ve cut the sugar in half—it also allows the toothsome taste of the strawberries to stand out.

Ingredients for the jam:
1kg strawberries, hulled, washed and drained. (1kg equals about 3 pints)
150g caster (icing) sugar. (Again, I like to cut this in half-75g-when the strawberries are in season but if you prefer your jam very sweet then add the full amount)


Direction:
Place the strawberries in a wide, stainless steel pan and sprinkle the sugar over top. Scrunch the strawberries up with your hands, really pushing them between your fingers to pulp them up—the mixture will start to look like jam at this point. You want all of the sugar to dissolve in the strawberry juice before you put the pan on the heat and bring it to a boil. Simmer for 20 to 30 minutes on a medium heat, and every 5 minutes or so come back to your jam to skim off the foam. Remove from the heat and put to one side. There you have it—beautiful, quintessential strawberry jam!


Fig. 3. Skim off the acrid surface foam; also, make sure you use a non-stick pan.


Note: I don’t like to wash the strawberries in water because it washes away some of the flavour. While I’m cutting off the stems, I simply wipe them gently with a paper towel. Also, Oliver’s jam is on the liquid side, I like mine a little thicker so I let it simmer for about an hour. Ten pints will yield about four 500ml mason jars.

Sunday, June 29, 2008

Winter Bulbs, Spring Onions


Fig 1. Onions planted by my grandfather last autumn. 5 months later. presto.


The marvel of spring never ceases to amaze me, even more so this year considering the brutal winter we had here in Montreal. Yet despite the severity of this year’s wintry ordeal, the spring onions and garlic emerged all the same; in fact, the large amount of snow might have helped the spring bloom as the blanket of snow protects the ground from the harsh frost and ice.

While onions are not packed with nutrients, they do contain some potassium and the green tops are a good source of vitamin C. Onions have also been found to be good for your heart due to the compound adenosine, which reduces the risks of clot formation and may also help promote sleep.

Locally grown Quebec spring onions, garlic, garlic ramps and green onions are now available at most farmers’ markets—as well as some of the bigger chains, look in the Quebec grown sections.
When they’re at they’re freshest I like them simply raw in salads or as an accompaniment to grilled meat.


Grilled Lamb with Spring Onions, Vine Cherry Tomatoes and Cilantro.
Serves 4

Ingredients
-4 pieces of Lamb—I like to use the leg of lamb cut in 1” slices by the butcher.
-4 tablespoons of extra-virgin olive oil
-3/4 cup of chopped spring onions or green onions
-10 to 12 cherry tomatoes cut in quarters
-1/2 cup of cilantro
-Salt and pepper

Directions
Season lamb with salt, pepper and olive oil and rub it into the meat at least 1 hour before cooking and bring the lamb to room temperature. While your grill is preheating, prepare the onions, tomatoes and cilantro. Lower the heat on the grill to medium and place the lamb on the hot grill—do not move or press down on the meat—let the grill do its work. I like my lamb medium-rare which means six minutes per side.
When lamb is done to your likeness, remove from heat and let it rest with a piece of aluminium foil over it. While your meat is resting, heat a pan with the extra-virgin olive oil over medium-high heat, add the onions, tomatoes, and cilantro. Don’t let it stew, cook it hot and fast while stirring all the while so it doesn’t stick—about 3 minutes.
Plate the lamb and spoon the onion, tomato, cilantro mixture over top. Sprinkle with salt, freshly ground pepper and drizzle with olive oil.


Note: You can pretty much use any meat you want including fish; and if for some reason you don’t like cilantro, you can substitute fresh Italian parsley.

Some historical notes of interest about onions:
-Ancient Egyptian tombs are adorned with pictures of onions believing that the circular layers within the onions represented life.
-Roman gladiators would rub onions all over their bodies believing it would make them stronger.
-Christopher Columbus brought onions with him to Haiti in 1492. Although some say that Chris introduced the onion to North America, they were growing wild throughout the Continent and were enjoyed by the Natives in a variety of ways.
-In the middle ages doctors believed onions helped with erections. Medieval viagra--eat up boys.

Wednesday, June 11, 2008

Sacred "Sangwiches"

For Italians, there are two panini that are coveted above all others. Indeed, possessing one of these majestic “sangwiches” in high school would create quite a predicament: being forced to share, being bribed, or somebody making you an offer you couldn’t refuse were just some of the tight spots the hungry students would find themselves in. One of these is the breaded veal cutlet panini and the other is the meatball panini.
I began to think about this when someone told me that the meatball recipe below made too many meatballs, (as if there were such a thing as too many meatballs) I reminded this poor, deluded fellow that he could freeze them, but here’s another option just in case your freezer is full.


Fig 1. Like we used to say at school, "that's nu bell panino"


Ingredients:
One round Italian “pagniotta” bread
20 slices of provolone cheese
10 to 11 meatballs (depends on the size of the bread) with some of the tomato sauce (see recipe below)
1 cup of pickled vegetables (such as Valli or Aurora)
10 large basil leaves
4 tablespoons of mayonnaise
1 tablespoon of red wine vinegar


Directions:

Cut the bread in half separating the top and bottom. Scoop out some of the soft part of the bread from both pieces being careful not to get too close to the crust. (Use the bread for bread crumbs, or make a nice panzanella salad). Leave a 2 cm rim of bread around both bottom and top parts of the bread. Layer the sliced provolone on the bottom part of the bread. Add as many meatballs as you can fit and drizzle with some of the tomato sauce-not too much or the bread can get soggy. Add the pickled vegetables and the fresh basil over top. In a bowl whisk the mayonnaise and red wine vinegar until combined and spread over the top part of the bread. Wrap the whole thing tightly with plastic wrap and place it in the fridge for a few hours (or even overnight) with a weight on top-this step helps keep the meatballs in place when it comes time to cutting the sandwich, there’s nothing more annoying than loose balls. (I use a same-size pan topped with two cans of tomatoes. Be careful not to make it too heavy or the bread can begin to break.) Eat cold or if you prefer it warm, put in a preheated 300 degree oven for 20 to 30 minutes.
Note: You can change anything in this sandwich except the meatballs. I also make it with spicy marinated eggplants and roasted peppers. Use your imagination.

Wednesday, May 21, 2008

Nonna's Meatballs

I want to thank everyone who called or e-mailed me with regards to my Mother’s Day story in the Montreal Gazette. The accolades are very much appreciated. My grandmother was quite taken back by seeing her picture in the paper and still wonders how much I paid for it. I know there are people who didn’t see the article so in this post I’m reprinting the article exactly as it appeared (except for the material which was cut) with the sincere hope than many of you will give these wonderful meatballs a try.


Nonna's Meatballs

When I was seven years old, my grandmother had given me the best job I would ever have: I was to tell her if the meatballs were ready. I remember watching the big pot of simmering tomato sauce, with the meatballs bobbing up and down, wondering when I would get to taste another one. It’s no wonder I never wanted to eat sitting at the table, I was way too full from having eaten in the kitchen. To this day, our meagre attempts still don’t rival my grandmother’s tender, flavourful meatballs. I am still blessed to have my grandmother with me. My son, who is eight, has taken over my job; he now works hand in hand with his grandmother as the “official meatball tester.”

This recipe will make 25 to 30 meatballs, so have your whole family over!

Ingredients:
½ kilo of minced beef (medium or lean)
½ kilo of minced pork
½ kilo of minced veal
3 cups of seasoned fresh breadcrumbs (we make our own by putting day old bread, parsley, oregano and salt and pepper in a food processor and pulsing to a rough chop. If the bread is too dry you won’t get the same results.)
½ cup of water
3 eggs
½ cup of grated parmigiano reggiano cheese
Salt and pepper
A pot of homemade tomato sauce, prepared in advance and heated.


Directions:
Put all of the meat in a very large bowl. (A salad bowl works well here). In a smaller bowl, combine the water and the breadcrumbs. With your fingers, work the bread crumbs until they become mushy, the bread should look like oatmeal (If you find the bread to be dry, add a bit more water.)
Add the breadcrumb mush to the meat and incorporate. Add the eggs, cheese, salt and pepper and mix it all thoroughly with your hands. The hands are also an important ingredient, they add the love necessary to make these meatballs taste the way they should.
Form into meatballs somewhere between the size of a golf ball and a tennis ball.


Add the raw meatballs to the simmering tomato sauce, after 45 minutes find a meatball tester and eat with a big bowl of pasta. (Note: do not stir the sauce as soon as the meatballs are added- they are still too soft and will loose their shape if stirred. Let the sauce return to a simmer and wait fifteen minutes before stirring carefully.)
Meatballs also freeze very well. If you don’t want to cook all of them, freeze them by placing the meatballs on a cookie sheet lined with parchment paper. Place the cookie sheet in the freezer-once the meatballs are frozen transfer to a freezer bag. They keep about one month in a ziplock, and six months (and more) vacuum-packed.

Thursday, May 8, 2008

Do You Know Your Farmer?

------------------------------------------------------------------------------
Author and farming advocate Margaret Webb was at Bon Appetit Cookbooks on Tuesday, May 6th to speak about her new book, Apples to Oysters: A Food Lover’s Guide to Canadian Farms. In her book, Webb takes the reader on a cross-country visit to eleven Canadian farms and introduces us to eleven very distinctive, extraordinary and passionate farmers, or as Webb calls them “chefs of the soil.”
Webb brought up many interesting questions, such as why we import apples from the U.S and Chile when we have in abundance here in Ontario and in the B.C. Okanagan; and more importantly, why don’t we hold our farmers in higher regards?
I’m well aware that the cynic and pragmatist in all of us knows the answers to these questions, (question #1: because people want cheap apples, and question #2: Farmers? What farmers?) but Webb’s approach is one of intimacy rather than an attempt at bringing down the giant industrial agricultural monster which supplies the many supermarkets at every corner of the suburban world. She simply gets to know her farmers, and that’s something, according to Webb, all of us should do. Everyone from Rachel Ray to Jamie Oliver are telling us that as savvy foodies, we should all get to know our butchers, fishmongers and cheese purveyors; so why not our farmers?
The fresh vegetable season is almost upon us so don’t be afraid to ask where the zucchini, lettuce, or garlic comes from. Farmer’s markets are obviously the ideal place to get to know a farmer, but in the name of research and to show you that such questions can and should be asked anywhere, I went to the Loblaws closest to my house where a very young man (or was he a boy?) stared at me for a while with his mouth agape when I asked him where the apples were from. Instead of speaking he started looking around no doubt for somebody to rescue him from this overly-curious man. To be fair some of the produce at Loblaws had the place of origin indicated, but not all.
I decided to leave and headed for an I.G.A. not far away. All of the produce was labeled with the country of origin (most of the vegetables are from the U.S.A., except for the bell peppers which were from Holland and the garlic which is now imported in mass quantities from China.) I asked a smartly dressed man if he could recommend any local vegetables, instead of running away, he rightly told me that it’s still too early in the season but they soon would have a whole section dedicated to local produce, some from small farms and some from the industrial farms. He then suggested a locally grown greenhouse tomato from a small producer in Mirabel called, Les Serres Stephane Bertrand, and poceeded to give me several information cards (see fig.2) that he thought might help with my vegetable curiosity. Needless to say I left impressed.


Fig.2. Vegetable information cards from I.G.A.


Those of you who have experienced the marvel of a perfect vegetable grown from pure, uncontaminated, fresh manure ejected from that happy, grass-grazing bovine will know that such vegetables do not require much preparation and handling. The tomatoes I bought at I.G.A., while not the best I’ve ever had, certainly stood on their own. Remember, quick recipes should be fast by the nature of their ingredients and not because of harried attitudes. The better the ingredients, the less you need to do with them.


Tomato and Orange Salad
Serves 2 to 3

2 large tomatoes
1 orange
20 basil leaves
Kosher Salt
Freshly Ground Black Pepper
Good Quality Extra-Virgin Olive Oil

Directions:
Slice tomatoes and orange and arrange in a plate with the basil. Sprinkle with salt and pepper and drizzle generously with good quality first cold pressed extra-virgin olive oil. (The regular olive oil in the big rectangular tin won't work here. Go buy the good stuff!)
Have some bread around to absorb the expensive olive oil you just bought.

Note: Add some sliced fresh mozzarella cheese (such as fior di latte, mozzarella di buffalo, or fresh boconccini) and it becomes an Insalata Caprese. I sometimes like to add some lemon zest and a drizzle of good balsamic vinegar for some contrast and tanginess.

Saturday, May 3, 2008

Marche Gourmand Laval

Food lovers in Laval can now rejoice. The tides of culinary inferiority between islands are slowly changing. Along with our farmer's market, Marche 440--which is located on the 440 service road next to Club Price, foodies now have another haven to obsess over.

The Marche Gourmand is located at, 2888 avenue du Cosmodome, and is part of the obscenely over-developed Centropolis complexe. I decided to pay the new market a visit upon hearing that a Premiere Moison had finally opened. During my last visit, the market offered more boarded up locals with "overture bientot" signs than vendors displaying their fares.

I always like to approach a market the same way. There is something very gratifying in playing the role of casual observer. Walking about with an attitude of unobstrusiveness as I take it all in. I let the market seduce me.

The first shop upon entering is Premiere Moisson, and it is the largest I've ever been in. Is it me or do they seem to be selling all manners of victuals? The selection in here is daunting, from their impressive breads, cakes, pies, and pates to a wide selection of prepared sandwiches and salads, which patrons seemed to be enjoying in the seated section. Also available, a wide array of prepared sauces and French classics such as Confit de Canard and Beef Bourguignon. (I'm not a fan of prepared food but The Hungry Italian will try everything once without bias. If anyone has tried any of these ready-to-go meals I would love to know what they're like.) I couldn't leave without buying something, and one look at the sugar pies made my legs feel weak. So three small pies and a ficelle later my market adventure continued.


Fig. 3 Inside Premiere Moisson


Fig.4 Maple Syrup, apricot, and pecan pies from Promiere Moison. All good, especially the maple syrup, the crust is reminiscent of a brown sugar shortbread and added a nice contrast to the soft filling. Also beautiful is the packaging, although some might say excessive.


Walking past a large Boucherie, with several butchers enticing passer-by's to covet their meat, I suppressed the carnivore in me and welcomed the herbivore. Next stop, Fruiterie 440, prices are good but the quality can sometimes leave something to be desired. The selection, however, is impressive; I bought some kale and was on my way. There's something sublime about eating kale. It's as though with every bite your life is slightly prolonged, and like the invincible inhabitants of Crete you too can live to the ripe age of 101.

Out of the fruiterie and into La Maison du Fromage; An impressive cheese shop with a staggering choice of cheese. The staff was very helpful and know their way around un-pasteurized French cheese and Italian cow's milk cheese equally. I was taken by surprise when I asked for smoked provolone and was immediately answered with "how much would you like?" Unlike the more readily available smoked gouda and gruyere, smoked provolone, (made from whole cow's milk), has a mild sharpness (which comes from the sourness of whole unadulterated cow's milk), and it is also sweeter than its Dutch and Swiss counterparts. This is not an easy cheese to find; needless to say, I happily bought some of this smoky goodness, as well as some grana padano, and continued on.


Fig.5 Cacciocavallo, Gorganzola, and the elusive smoked provolone


My next stop was La Fournee des Sucreries de L'Erable. The Maple Syrup pie I tasted here was the best I've ever had. The filling just seemed to dissolve on the tongue, and didn't have that "my teeth are hurting" level of sweetness or grainy texture which often comes with pies containing too much sugar. I purchased a couple of pet de soeur and the biggest macaroon I've ever seen and kept walking.

Bonbons & Cie is a small candy shop specializing in all manners of hard to find bonbons. Browsing in this shop brought back memories of the after school depanneur haunts of old.


Fig.6. The still- popular ring pop and the renamed, Popeye's "candysticks". I showed my son how to roll the box in his shoulder sleeve so he would look like a "Greaser".


Walking past a pizza place and an Eastern European charcuterie,(where I tasted a very nice smoked Kielbasa) the aroma in the air led me to Creperie Oasis Gourmand. I surrendered to the smell and shared a Nutella crepe with my son.


Fig.7 Fresh crepes "Parisienne"


Walking past a Kitchen supply shop, which housed an impressive variety of "old school" pasta making tools, a Saucissier, and a shop specializing in oils and vinegar, I came face to face with a store I was already familiar with, just not in Laval. Along with the Marche Jean-Talon, Laval now has a proper fresh pasta shop with Pastificio Sacchetto. I've bought pasta from Pastificio before and have always been satisfied, and the prices are comparable with other fine pasta shops in St. Leonard, R.D.P., and St Michel.


I left the store giddy and satisfied with a kilogram of gnoccetti, half a kilo of spaghettini and some decadent Panna from parmelat which no self-respecting kitchen should be without.


Fig 9 Mushroom ravioli


Coming to the end of my market journey, I spot a chocolate shop called, I Love Chocolat.com. The shop had a nice variety of handmade chocolate and the owner, Annie Roggero, was very gracious with her information. She informed me that all of her dark chocolate is Belgian and 75% pure. Her milk chocolate is an above average 45% pure, and that she also has a line of sugar free chocolate which she developed for her diabetic mother. I tasted some of her milk chocolate, which wasn't as creamy as I was accustomed to, but had a much deeper cocoa flavour to it. I drifted out of the store with chocolate melting in my mouth.


Fig 10, Tea's from around the world meet chocolates made in Montreal


It was time for a coffee break to ponder supper. I opted for some take home sushi given the amount of chocolate I had consumed on this market discovery.

People sometimes ask me why I go to the trouble of writing something like this when I don't get anything out of it. It's difficult to make people understand that the satisfaction comes not only in the writing, but in the sharing; a selfless quality I believe all food lovers possess. My sincere hope is that some of you reading this article will side-step the time-convenience of a supermarket frozen pizza and instead find your own market such as this one and have your own adventure. Buy all of the ingredients fresh, whether it be for a pizza, a pasta alla vongole, or even a simple grilled cheese, take them to your kitchen and create proper food.
It has always been my contention that there's nothing convenient about ready made prepared foods. In the end it is your health which matters most, and there's nothing convenient about destroying your body.

It's up to us Laval residents to help out the little guys; Galen Weston Jr. has enough money. Take your family and explore the Marche Gourmand.


Le Marche Gourmand:

Premiere Moisson, 450-682-1800

Bonbon & Cie, 514-953-5207

Boucherie La Superieure 450-686-8889 -
Other location: 7500 boul. Les Galeries-d'Anjou 514-355-2640 in Les Halles Anjou

Pizza Gourmande, 450-688-3544

La Maison du Fromage, 450-973-2743

Charcuterie Balkani, 450-680-1626
-Other location: 7070 Henri Julien, 514-807-1626, Marche Jean-Talon

La Boutique de L'Olivier, 450-681-6003

Olive & Olive, 450-687-8222
-Other locations: 1389 Laurier est Montreal 514-526-8989
428b ave Victoria Saint-Lambert 450-923-2424
Marche Jean-Talon 514-271-0001

Cuisine-Promax, 450-682-0947

Le Petit Coin d'Europe, 450-686-0492

La Fournee des Sucreries de l'Erable 450-686-7718
-Other locations: Marche Jean-Talon 514-279-7830
6423 rue d'iberville, Rosemont, 514-727-8085
4492 rue Granier, 514-524-4464 Plateau Mont-Royal


Pastificio Sacchetto, 450-686-9222
-Other Location: 7070 Henri-Julien, 514-274-4443, Marche Jean-Talon http://www.pastificio.ca/

I Love Chocolate.com, 450-963-7402http://www.ilovechocolat.com/
-Other locations: Choco Style 1093 Legendre est, Montreal

Un Amour des Thes, 514-605-7448
-Other locations: 1224 Bernard Ouest, Outremont
5612 Monkland, Montreal

Le Marais, 450-688-9993

Sushiman, 450-687-1212

Creperie Oasis Gourmand

Fruterie 440

Poissonnerie Odessa (to open in two weeks)

Sunday, April 27, 2008

Italian Food for a Good Cause

_______________________________________________


Fig A, Ossobucco Milanese con polenta e rapini.

On Saturday, February 23rd, Princess Mattress held its first Italian market gourmet gala, the proceeds of which to benefit the Quebec cystic fibrosis foundation. The event, which was held at Buffet Amiens, was not only a resounding success, but also a testament to everything Italian. Heartfelt thanks to owner Peter Triassi and everyone at Buffet Amiens; chefs Pasquale Teoli and Michele Falduto in particular, whose experience in the kitchen proved invaluable.
When I set out to organize this event, my goal-apart from helping a great cause-was to bring to the spotlight dishes from different regions of Italy. A monumental task given how varied Italian cuisine, (as well as Italian opinions), can be. So like everything in life, we would start small and from the beginning.
Anyone who knows me is aware of how obsessive and exacting I am when it comes to proper food, when it came time to choose a location for the event, it seemed obvious. I entered the reception hall armed with ideas, desires, and humble demands. Rather than throw me out, Peter looked at me and said, “We could do it, but maybe it would be good if you spoke to the chef”. Seven months and several meetings later we finalized the menu.

Menu for the Gala
~Antipasto Misto Italiano~
(Lonza, prosciutto, bresaola, parmiggiano reggiano, pepato Siciliano, crotonese, ricotta fresca.)
~Pasta Casareccia Con Funghi Porcini~
~Insalata Trevisana~
~Ossobuco Alla Milanese con Polenta, Rapini, e Peperoni~
~Calamari Grigliati al Carbone~
~Delizia al Mascarpone~
~Sweet Table- Italian sausage and peppers, Trippa con pomodoro, Porcheta, Cozze con pomodoro and Fresh fruit~


The Ossobucco was definitely the standout dish of the evening. It was both flavourful and exceedingly tender. The sauce was velvety with depth, without being overpowering; in my opinion, a perfectly balanced version of an often missed dish. Before the beloved tomato made its appearance in Italy, Ossobucco alla Milanese was made in bianco,--much the same way it’s made today in the north of Italy. (While doing some research I was surprised to discover very old recipes that included such ingredients as cinnamon, cloves and allspice.) These days in Milan, the use of tomatoes, only as a base, is common practice. It’s usually in the form of tomato paste and never in large amounts, or you risk turning an Ossobucco alla Milanese into an Ossobucco con pomodoro. Here’s the recipe for ossobucco the way it was served at the gala.

Ossobucco Alla Milanese
Ingredients:
¼ cup of unsalted butter
4 tablespoons of olive oil
4 veal shanks, 2” thick
flour, for dredging
1 medium carrot, chopped into ½” pieces
1 medium onion, rough chop
1 celery stalk, chopped into ½” pieces
2 tablespoons of chopped fresh thyme
1 tablespoon of tomato paste
1 cup of dry white wine
1 ½ cups of chicken stock (low sodium)
2 bay leaves

Gremolata (A traditional topping added at the very end, and no it’s not optional.)

2 garlic cloves, minced
2 tablespoons of chopped fresh parsley
2 teaspoons of chopped (not too small) lemon zest

Season the veal shanks with salt and pepper on both sides; dredge the veal lightly on both sides in the flour being sure to shake off any excess. In a Dutch oven or a heavy bottom, oven proof pot, set over medium-high, add the butter and olive oil. When the oil begins to lightly smoke add the veal shanks one at a time. The browning is very important, as Mario Batali writes in his book, Simple Italian Food , “The true trick to all braised dished is the very first step: carefully and comprehensively browning the pieces to a deep golden brown. This not only makes for a delicious, full-flavoured piece of meat, but also contributes to a rich and complex sauce.(202) When the shanks have properly browned, remove from the pot and set aside. Turn the heat to medium and in the same pot (do not clean it, the brown bits left from the veal and flour are essential, you might, however, have to add a couple of tablespoons of olive oil if the bottom of your pot is too brown) add the carrot, onion, celery and fresh thyme. Cook, stirring often until softened and golden brown-about 8 to 10 minutes. Add the tomato paste and cook until it darkens from bright red to rust orange, about 3 minutes, add the wine, chicken stock and bay leaves and let it come to a boil for about 3 minutes. Place the veal shanks back in the pot (I like to make sure my veal is not touching the bottom of the pot by making sure some of the vegetables are under it. This insures that the liquid can cook the bottom of the veal evenly.) Make sure your veal is submerged at least halfway, if it isn’t, add more chicken stock. Cover with aluminum foil and the lid and place in a preheated 350 degree oven. Contrary to popular belief you can overcook ossobucco, (or any braised meat for that matter). The ossobucco is done when the meat near the bone comes loose without too much resistance, 1 ½ to 2 hours. Remove from the oven, sprinkle the gremolata over the meat, cover and let it rest for 10 minutes. If the meat begins to separate from the bone on its own, it’s slightly overcooked. If the marrow has left the center of the bone and melted into the sauce because some stupid friends arrived over 1 hour late, then wrap up the ossobucco and give it to your friends in a doggy bag and kick them out.
Ossobucco is usually served with risotto alla Milanese. I like it with a soft polenta or lentils; but my favourite is to serve the ossobucco on top of a toasted slice of bread, which has been rubbed with garlic and softened with olive oil—lay some rapini on the bread and top with the ossobucco. Pour some cooking jus over the meat and enjoy.

Cystic fibrosis (CF) is a fatal genetically inherited disease, affecting mainly the lungs and the digestive system. Cystic fibrosis is usually diagnosed at a very young age –normally within the first year of a child’s life. Children afflicted with cystic fibrosis are on constant medication and require daily help from a ventilation machine, which clears the child’s lungs in order to breathe. Most people with CF will eventually die of lung disease before the age of 35. To experience what it would be like to live with CF, block your nose and breathe through your mouth with a straw. That is the everyday reality of a child afflicted with cystic fibrosis. The people at the L’Association de la fibrose kystique give a lot of their time to the cause. I want to thank Eve-Amelie for her help, and a special thanks to vice-president of the Montreal chapter, Daniel Dettmers for his attendance and kind words of support. If you would like to help, at any time, donations can be made at, http://www.aqfk.qc.ca/

Buffet Amiens: 8700 boul langelier, St Leonard. 514-326-3010